集群中Session解决方案之Spring Session

什么是 Spring Session

主要功能如下:

  • 从任意的环境中访问一个会话 (例如. web, messaging infrastructure, 等等)
  • WEB 环境下
  • 供应商中立的情况下支持集群
  • 可插拔策略可以确定 session id
  • WebSocket 活跃的时候可以简单的保持 HttpSession

主要特性

  • API and implementations (i.e. Redis) for managing a user’s session
  • HttpSession
  • Clustered Sessions
  • Multiple Browser Sessions
  • RESTful APIs
  • 支持WebSocket

实现原理

因为规范里的 HttpSession 以及 HttpServletRequest 都是一种接口,所以可以通过实现该接口来处理我们自定义的逻辑。

Spring Session里的自定义实现HttpServletRequest的逻辑代码:

1
2
3
4
5
6
7
8
9
10
11
12
13
14
15
16
public class SessionRepositoryRequestWrapper extends HttpServletRequestWrapper {
public SessionRepositoryRequestWrapper(HttpServletRequest original) {
super(original);
}
public HttpSession getSession() {
return getSession(true);
}
public HttpSession getSession(boolean createNew) {
// create an HttpSession implementation from Spring Session
}
// ... other methods delegate to the original HttpServletRequest ...
}

HttpServletRequestWrapperHttpServletRequest实现的一种包装器,可通过继承它来实现自己的主要逻辑代码,而不用直接实现HttpServletRequest接口来写大部分复杂的代码,只需要关注自己想要覆盖逻辑代码即可。
在这里,因为我们想要实现的是Session共享机制,所以这里只加入了处理Session的业务逻辑即可。
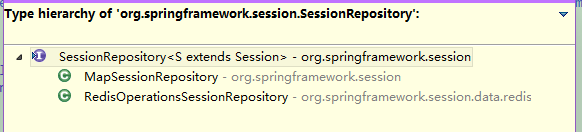
Spring Session默认情况下只有两种Session策略。一种是使用Map来实现,一种是使用Redis来实现。

如果我们想要实现自定义的Session持久化机制,我们可以实现该接口,然后添加到Session策略实现方式即可。

包装完自定义的HttpServletRequest后,就可使用了。方法是通过 Filter 来将Spring包装的HttpServletRequest代替容器原有的即可。代码如下:

1
2
3
4
5
6
7
8
9
10
11
12
public class SessionRepositoryFilter implements Filter {
public doFilter(ServletRequest request, ServletResponse response, FilterChain chain) {
HttpServletRequest httpRequest = (HttpServletRequest) request;
SessionRepositoryRequestWrapper customRequest =
new SessionRepositoryRequestWrapper(httpRequest);
chain.doFilter(customRequest, response, chain);
}
// ...
}

Maven

1
2
3
4
5
6
7
8
9
10
11
<dependency>
<groupId>org.springframework.session</groupId>
<artifactId>spring-session-data-redis</artifactId>
<version>1.0.0.BUILD-SNAPSHOT</version>
<type>pom<type>
</dependency>
<dependency>
<groupId>org.springframework</groupId>
<artifactId>spring-web</artifactId>
<version>4.1.3.RELEASE</version>
</dependency>

Hello World(以Spring为基础,其他框架,也可以参考该思路作小修改即可)

web.xml 添加以下 Filter

1
2
3
4
5
6
7
8
9
10
11
12
13
<filter>
<filter-name>spring-session</filter-name>
<filter-class>org.springframework.web.filter.DelegatingFilterProxy</filter-class>
<init-param>
<param-name>targetBeanName</param-name>
<param-value>springSession</param-value>
</init-param>
</filter>
<filter-mapping>
<filter-name>spring-session</filter-name>
<url-pattern>/*</url-pattern>
</filter-mapping>

spring.xml 添加

1
2
3
4
5
6
7
8
9
10
11
12
13
14
15
16
17
18
19
20
21
22
23
<!--这里添加的是Redis,因为使用的是Spring里自带的RedisSession策略 -->
<bean id="v2redisConnectionFactory" class="org.springframework.data.redis.connection.jedis.JedisConnectionFactory"
p:host-name="10.0.0.40" p:port="6379" p:use-pool="true" p:database="8" />
<bean id="stringRedisSerializer"
class="org.springframework.data.redis.serializer.StringRedisSerializer"/>
<bean id="v2redisTemplate" class="org.springframework.data.redis.core.RedisTemplate"
p:connection-factory-ref="v2redisConnectionFactory"
p:keySerializer-ref="stringRedisSerializer"
p:valueSerializer-ref="stringRedisSerializer"
p:hashKeySerializer-ref="stringRedisSerializer"
p:hashValueSerializer-ref="stringRedisSerializer" />
<!-- 这里的是为了下面的 Session策略过滤器提供构造函数传入的参数,因为Session过滤器要依赖该对象来构造,所以创建一个先 -->
<bean name="redisOperationsSessionRepository" class="org.springframework.session.data.redis.RedisOperationsSessionRepository">
<constructor-arg ref="v2redisConnectionFactory"></constructor-arg>
</bean>
<!-- 这个是Session策略过滤器,即将容器原有的Session持久化机制,代替为SpringRedis持久化Session机制。 -->
<!-- 注意,这个名字与 web.xml里的targetBean的下value是要一致的。 -->
<bean name="springSession" class="org.springframework.session.web.http.SessionRepositoryFilter">
<constructor-arg ref="redisOperationsSessionRepository"></constructor-arg>
</bean>

使用上跟普通使用 Session 的方式是一样的。

打完收工。